
TV channels are easily available over the internet via IPTV services. However, most people have difficulty making them work well with the TV, soundbar, Wi-Fi, and remote they have. That’s the point of IPTV integration into the home entertainment system, making modern internet television accessible to everyone in the family with the press of a few buttons.
IPTV stands for Internet Protocol Television. Your favourite shows and movies are delivered via the internet to your television, as opposed to being broadcast via satellite or cable.
It’s been a huge change for Indian families in Australia. Without IPTV, tuning into Hindi, Punjabi, Tamil, or Telugu channels involved a dish on the roof or a bunch of apps, playlist links, and VPNs that kept crashing.
Today, a service like ours Real TV is revolutionary because with it, one can watch local Indian channels, sports, web series, and movies in languages like Punjabi, Tamil, Telugu, and more without a dish, VPN, or unsafe apps. Just plug in a box, connect it to the internet, and start watching.
All you need is a TV with a free HDMI port (does not have to be a smart TV), a home internet connection, and an IPTV device. Here’s how to configure IPTV properly, step by step, and further you will get to know about IPTV integration with your home entertainment system
Step 1 – Test Your Internet Speed (The Proper Way)
 As per the recommendations from the IPTV service providers, one should have at least 5 Mbps for Full HD (1080p) and 15 Mbps for 4K internet for a buffer-free experience, at least for a buffer-free experience. Live TV is similar.
The trick is to track everything that’s going on in your home at one time regarding the total usage and know the ideal speed you will need. One TV is on, showing a cricket match in HD; someone else is in the bedroom on YouTube, and the kids are gaming. They’re all on the same connection. Most families are happy with a plan that provides about 50 Mbps in the evening. If you regularly run two or more 4K streams simultaneously, consider a faster plan.
Two effective tips are as follows:
- Test on the TV, not the router: Be close to the television set with your smartphone and check the speed at either fast.com or speedtest.net. This is the speed that the box will actually give you on the TV.
- Test at night: Networks become busy between 7 pm and 11 pm. This is the time when buffering may occur because there is a lot of traffic, and it is something you will not want, especially when you are enjoying your favourite entertainment
Step 2 – How to Set Up IPTV: Think about it!
Here are three popular ways to get an IPTV on your TV. They all work, but not all of them are equally easy to use.
Option 1: Smart TV Apps
Smart TVs have their own app stores, but many generic IPTV apps are just empty players. They tell you to copy and paste an M3U playlist link from some other seller, and that link can die on you without notice.
Option 2: Streaming sticks
The Amazon Fire TV Stick, Google TV Streamer, and Apple TV are excellent for Netflix or YouTube. But for Indian live TV, you’ll find yourself loading a playlist again, sometimes with a VPN on top.
Option 3: A dedicated IPTV box (easiest option)
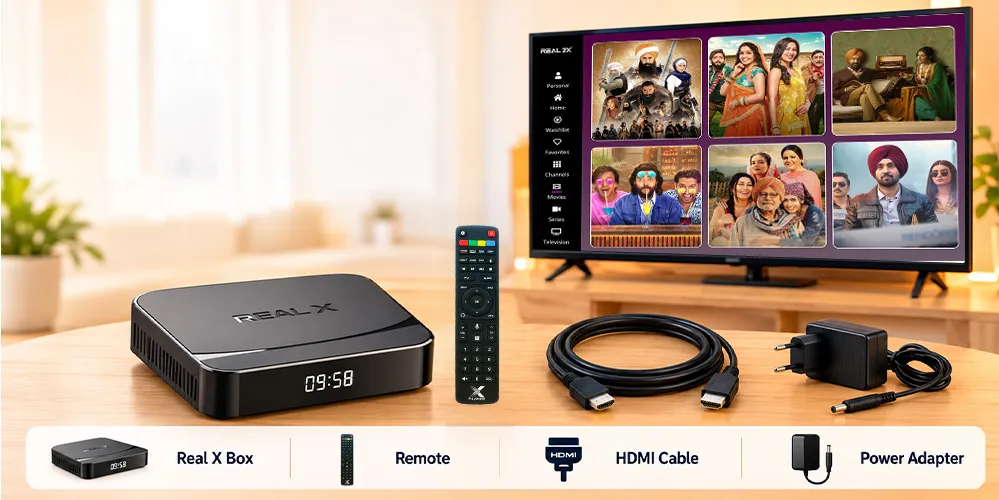
It’s a dedicated box, like the Real X box, that is ready to go. No need to paste playlists, no VPN to run, and no apps to sideload, and anyone can set it up in just a few minutes, as explained ahead
- Connect the box to your TV using the included HDMI cable and connect to the power adapter.
- Switch on the remote, and just when the light flashes, you can understand it is ready to pair automatically. If prompted, follow the steps shown on screen.
- Most importantly, it is imperative that you connect the IPTV box to your Wi-Fi network or an Ethernet cable. The latter option offers better speed.
- Activate your subscription using the information that came in your box or with a refill.
- Start watching.
Once it’s up and running, you get the full TV guide (EPG), up to 7 days of catch-up for shows you’ve missed, and voice search through the remote. Channels include Hindi, Punjabi, Tamil, Telugu, Malayalam, Bengali, Gujarati, Marathi, Kannada, Urdu and many more. The latest Real X box also comes with the free Real 2X app for smartphones, with separate profiles and parental controls for the family.
Step 3 – Connect Your Sound System
Modern TVs are thin, and the internal speakers are generally thin and quiet. And cricket commentary, Bollywood songs and dialogue sound much clearer on a soundbar or home theatre.
HDMI ARC or eARC (best for most homes)
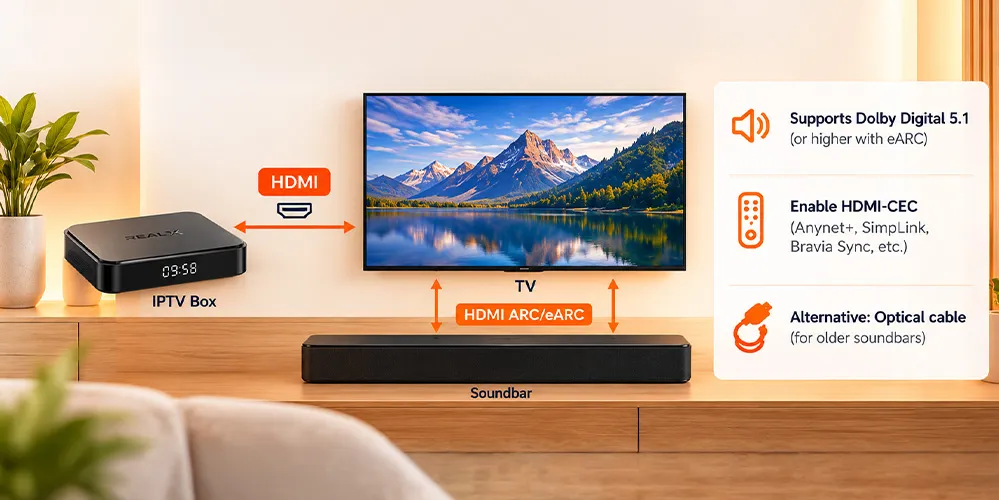
Hook up your IPTV box to any of the HDMI ports of your TV. Next, connect the soundbar to the TV’s HDMI port labelled ARC or eARC. The sound from the box goes to the TV and down to the soundbar. The standard ARC supports surround formats such as Dolby Digital 5.1. The new eARC can support higher quality formats like Dolby Atmos.
Then activate HDMI-CEC in your TV settings. A single remote control can be used to control both the TV and the soundbar volume. Each brand calls it by a different name, such as Anynet+ on Samsung, SimpLink on LG, and Bravia Sync on Sony.
Through an AV receiver
Plug the box into an HDMI input on the receiver, then run an HDMI cable from the receiver to the TV. The receiver does the sound, and then it sends the picture on.
Optical cable (for older soundbars)
If your soundbar has no HDMI, use an optical cable (Toslink) from the TV or straight from the Real TV box. It works well for stereo and standard 5.1 sound.
Step 4 – Home Assistant IPTV Integration (Optional)
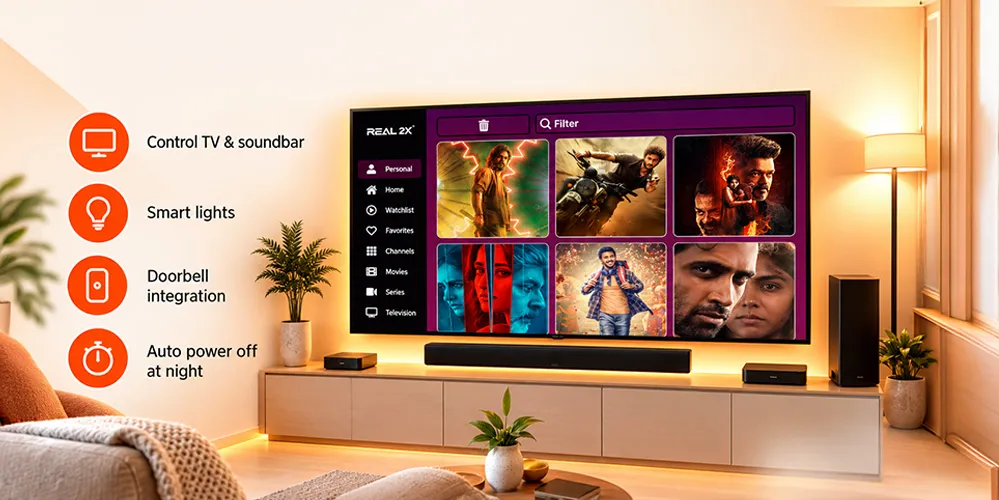
Home Assistant is open-source software that helps you bring all your smart devices together, such as lights, speakers, the doorbell, and your TV, so they work in harmony. The easiest way to begin using it is the Home Assistant Green, a tiny ready-made box that you plug into your router.
With a Home Assistant IPTV integration, you are able to:
- Switch on the TV and soundbar and dim the lights with the press of the dedicated button.
- When the doorbell rings, the TV turns off automatically.
- Turn everything off at a set time each night.
Such software connects directly to Google TV and Android TV boxes via Wi-Fi.
Digital Signage with IPTV Integration (for Business)
IPTV is not only home-based. Many Indian restaurants, sweet shops, grocery stores, and community halls in Australia have made use of digital signage with IPTV integration. This simply means that one of your screens will show your own content, such as a menu, prices, or upcoming events, alongside live TV. Think of a restaurant displaying its daily specials on one side of the screen while an India vs Australia match is being played on the other side.
Often this is done with signage software that merges your graphics with a live video feed. One thing to note: TV subscriptions made for homes are generally only licensed for personal use. You may well need a commercial viewing license to show live channels to customers—so speak to your provider before you set up this.
Simple Solutions to Everyday Problems
- Buffering during evening hours: Try it at peak hours, try switching to Ethernet if you’re able, and try rebooting the modem and router.
- No sound from soundbar: Check that it is connected to the ARC or eARC port, that HDMI-CEC is turned on, and that your TV audio output is set to external speaker or HDMI ARC.
- Remote not working: Pair your remote again by pressing the left and right buttons at the same time on a real TV box for over 3 seconds.
- Fuzzy or pulled-out picture: Change the box’s display settings and pick a resolution that will work with your TV.
Need more help? Browse our troubleshooting guides or visit the Real TV Helpdesk.
IPTV Integration: The Checklist
- Evening: TV, speed test of the Internet.
- A decent 5 GHz Wi-Fi signal or Ethernet cable where it exists.
- Sound bar connected to the ARC or eARC port with HDMI-CEC ON.
- Install software updates as soon as your box prompts you.
Summary
With IPTV, it doesn’t have to be complicated when integrated with your home entertainment system. With a good internet connection, a good IPTV device, and a properly connected sound system, you have everything you need to enjoy your favourite Indian TV channels, movies, web series, and live cricket without the unnecessary setup hassles. With the steps explained above, you can easily perform the IPTV integration at your home as per your preferences.
Real TV makes it easy for Indian families living in Australia to stay connected with the language and entertainment they love. Whether it’s a Punjabi serial, a Bollywood movie, or a live cricket match, the goal is simple less time setting things up and more time enjoying entertainment with your family.

